SpringCloud学习系列之四-----配置中心(Config)使用详解
本篇主要介绍的是SpringCloud中的分布式配置中心(SpringCloud Config)的相关使用教程。
SpringCloud Config
Config 介绍
Spring Cloud Config项目是一个解决分布式系统的配置管理方案。它包含了Client和Server两个部分,server提供配置文件的存储、以接口的形式将配置文件的内容提供出去,client通过接口获取数据、并依据此数据初始化自己的应用。
开发准备
开发环境
- JDK :1.8
- SpringBoot :2.1.1.RELEASE
- SpringCloud :Finchley
注:不一定非要用上述的版本,可以根据情况进行相应的调整。需要注意的是SpringBoot2.x以后,jdk的版本必须是1.8以上!
确认了开发环境之后,我们再来添加相关的pom依赖。
<dependencies>
       <dependency>
        <groupId>org.springframework.cloud</groupId>
        <artifactId>spring-cloud-config</artifactId>
    </dependency>
    <dependency>
        <groupId>org.springframework.cloud</groupId>
        <artifactId>spring-cloud-starter-netflix-eureka-server</artifactId>
    </dependency>
  </dependencies>
SpringCloud Config 示例
目前SpringCloud Config的使用主要是通过Git/SVN方式做一个配置中心,然后每个服务从其中获取自身配置所需的参数。SpringCloud Config也支持本地参数配置的获取。如果使用本地存储的方式,在 application.properties 或 application.yml 文件添加 spring.profiles.active=native 配置即可,它会从项目的 resources 路径下读取配置文件。如果是读取指定的配置文件,那么可以使用 spring.cloud.config.server.native.searchLocations = file:D:/properties/ 来读取。
服务端
首先是服务端这块,首先创建一个注册中心,为了进行区分,创建一个 springcloud-config-eureka 的项目。 代码和配置和之前的基本一样。
application.properties 配置信息:
配置信息:
spring.application.name=springcloud-hystrix-eureka-server
server.port=8005
eureka.client.register-with-eureka=false
eureka.client.fetch-registry=false
eureka.client.serviceUrl.defaultZone=http://localhost:8005/eureka/
配置说明:
- spring.application.name: 这个是指定服务名称。
- server.port:服务指定的端口。
- eureka.client.register-with-eureka:表示是否将自己注册到Eureka Server,默认是true。
- eureka.client.fetch-registry:表示是否从Eureka Server获取注册信息,默认为true。
- eureka.client.serviceUrl.defaultZone: 这个是设置与Eureka Server交互的地址,客户端的查询服务和注册服务都需要依赖这个地址。
服务端这边只需要在SpringBoot启动类添加 @EnableEurekaServer 注解就可以了,该注解表示此服务是一个服务注册中心服务。
代码示例:
@SpringBootApplication
@EnableEurekaServer
public class ConfigEurekaApplication {

	public static void main(String[] args) {
		SpringApplication.run(ConfigEurekaApplication.class, args);
		 System.out.println("config 注册中心服务启动...");
	}
}
创建好了注册中心之后,我们再来创建一个配置中心,用于管理配置。
创建一个 springcloud-config-server 的项目。然后在 application.properties 配置文件添加如下配置:
配置信息:
spring.application.name=springcloud-config-server
server.port=9005
eureka.client.serviceUrl.defaultZone=http://localhost:8005/eureka/
spring.cloud.config.server.git.uri = https://github.com/xuwujing/springcloud-study/
spring.cloud.config.server.git.search-paths = /springcloud-config/config-repo
spring.cloud.config.server.git.username =
spring.cloud.config.server.git.password =
配置说明:
- spring.application.name: 这个是指定服务名称。
- server.port:服务指定的端口。
- eureka.client.serviceUrl.defaultZone: 这个是设置与Eureka Server交互的地址,客户端的查询服务和注册服务都需要依赖这个地址。
- spring.cloud.config.server.git.uri: 配置的Git长裤的地址。
- spring.cloud.config.server.git.search-paths: git仓库地址下的相对地址 多个用逗号”,”分割。
- spring.cloud.config.server.git.username:git仓库的账号。
- spring.cloud.config.server.git.password:git仓库的密码。
注:如果想使用本地方式读取配置信息,那么只需将 spring.cloud.config.server.git 的配置改成 spring.profiles.active=native ,然后在resources路径下新增一个文件即可。
这里为了进行本地配置文件测试,新建一个 configtest.properties 配置文件,添加如下内容:
word=hello world
代码这块也很简单,在程序主类中,额外添加 @EnableConfigServer 注解,该注解表示启用config配置中心功能。代码如下:
、、、
@EnableDiscoveryClient
@EnableConfigServer
@SpringBootApplication
public class ConfigServerApplication {

    public static void main(String[] args) {
        SpringApplication.run(ConfigServerApplication.class, args);
        System.out.println("配置中心服务端启动成功!");
    }
}
、、、
完成上述代码之后,我们的配置中心服务端已经构建完成了。
客户端
我们新建一个 springcloud-config-client 的项目,用于做读取配置中心的配置。pom依赖还是和配置中心一样,不过需要新增一个配置,用于指定配置的读取。
创建一个 bootstrap.properties 文件,并添加如下信息:
配置信息:
spring.cloud.config.name=configtest
spring.cloud.config.profile=pro
spring.cloud.config.label=master
spring.cloud.config.discovery.enabled=true
spring.cloud.config.discovery.serviceId=springcloud-config-server
eureka.client.serviceUrl.defaultZone=http://localhost:8005/eureka/
配置说明:
- spring.cloud.config.name: 获取配置文件的名称。
- spring.cloud.config.profile: 获取配置的策略。
- spring.cloud.config.label:获取配置文件的分支,默认是master。如果是是本地获取的话,则无用。
- spring.cloud.config.discovery.enabled: 开启配置信息发现。
- spring.cloud.config.discovery.serviceId: 指定配置中心的service-id,便于扩展为高可用配置集群。
- eureka.client.serviceUrl.defaultZone: 这个是设置与Eureka Server交互的地址,客户端的查询服务和注册服务都需要依赖这个地址。
注:上面这些与spring-cloud相关的属性必须配置在bootstrap.properties中,config部分内容才能被正确加载。因为bootstrap.properties的相关配置会先于application.properties,而bootstrap.properties的加载也是先于application.properties。需要注意的是 eureka.client.serviceUrl.defaultZone 要配置在bootstrap.properties,不然客户端是无法获取配置中心参数的,会启动失败!
application.properties配置
spring.application.name=springcloud-config-client
server.port=9006
配置说明:
- spring.application.name: 这个是指定服务名称。
- server.port:服务指定的端口。
程序主类代码,和之前的基本一致。代码如下:
代码示例:
@EnableDiscoveryClient
@SpringBootApplication
public class ConfigClientApplication {

	public static void main(String[] args) {
		SpringApplication.run(ConfigClientApplication.class, args);
		System.out.println("配置中心客户端启动成功!");
	}
}
为了方便查询,在控制中进行参数的获取,并返回。 @Value 注解是默认是从 application.properties 配置文件获取参数,但是这里我们在客户端并没有进行配置,该配置在配置中心服务端,我们只需指定好了配置文件之后即可进行使用。
代码示例:
@RestController
public class ClientController {

	@Value("${word}")
	private String word;

    @RequestMapping("/hello")
    public String index(@RequestParam String name) {
        return name+","+this.word;
    }
}
到此,客户端项目也就构建完成了。
功能测试
完成如上的工程开发之后,我们来进行测试。
本地测试
首先我们把 springcloud-config-server 项目的 application.properties 配置文件添加 spring.profiles.active=native 配置,注释掉 spring.cloud.config.server.git 相关的配置,然后在src/main/resources目录下新建一个 configtest.properties 文件,然后在里面添加一个配置 word=hello world 。
添加完成之后,我们依次启动 springcloud-config-eureka 、 springcloud-config-server 、 springcloud-config-client 这三个项目。启动成功之前,先看来看看配置中心服务端的配置文件获取,在浏览器输入:
http://localhost:9005/configtest-1.properties
查看该文件的配置信息。
注:配置文件的名称是 configtest.properties ,但是如果直接该名称的话是获取不到的,因为在配置文件名需要通过 - 来进行获取,如果配置文件名称没有 - ,那么添加了 - 之后,会自动进行匹配搜索。
springcloud config 的URL与配置文件的映射关系如下:
/{application}/{profile}[/{label}]
/{application}-{profile}.yml
/{label}/{application}-{profile}.yml
/{application}-{profile}.properties
/{label}/{application}-{profile}.properties
上面的url会映射{application}-{profile}.properties对应的配置文件,{label}对应git上不同的分支,默认为master。
界面返回:
word: hello world
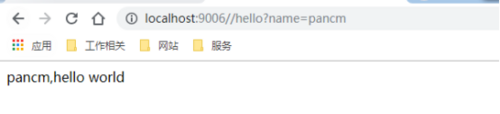
然后调用客户端的接口,查看是否能够获取配置信息。在浏览器上输入:
http://localhost:9006//hello?name=pancm
界面返回:
pancm,hello world
示例图:

Git测试
在完成本地测试之后,我们把这个 spring.profiles.active=native 配置注释掉,解除 spring.cloud.config.server.git 相关的注释(账号和密码要填写真实的),然后在git仓库上建立一个config-repo 文件夹,新建 configtest-pro.properties 、 configtest-dev.properties 两个配置,这两个的配置分别是 word=hello world!! 和 word=hello world! , 然后和 configtest.properties 配置文件一起上传到config-repo 文件夹中。
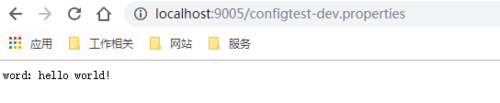
首先在浏览器输入:
http://localhost:9005/configtest-dev.properties
浏览器返回:
word: hello world!
然后再浏览器输入:
http://localhost:9005/configtest-pro.properties
浏览器返回:
word: hello world!!
上传了 configtest.properties 文件,但是这个文件名称没有 - ,我们想获取其中参数的信息的话,可以在然后 - 随意添加一个参数,它会自动进行匹配,在浏览器输入:
http://localhost:9005/configtest-1.properties
浏览器返回:
word: hello world
然后进行客户端接口调用测试,在浏览器输入:
http://localhost:9006/hello?name=pancm
浏览器返回:
pancm,Hello World!!
由于这里我配置的前缀是 pro ,所以读取的是 configtest-pro.properties 文件的数据,想要获取其他的配置,修改 spring.cloud.config.profile 配置即可。
示例图:


正文到此结束
- 本文标签: 服务端 端口 Netflix map App http springboot https 服务注册 Bootstrap 参数 Master 测试 Spring cloud 集群 注释 src 高可用 git 注册中心 数据 REST IO spring springcloud cat 代码 client 分布式 SVN 配置中心 UI Eureka Service 目录 Hystrix tar GitHub 开发 id pom Spring Cloud Config 配置 value Word 分布式系统 2019 管理 dependencies
- 版权声明: 本文为互联网转载文章,出处已在文章中说明(部分除外)。如果侵权,请联系本站长删除,谢谢。
- 本文海报: 生成海报一 生成海报二
热门推荐


相关文章

近期评论
-
出现OpenClaw "device signature expired"。the Gateway rejects if Math.abs(Date.now() - signedAt) > 10 * 60 * 1000 (10 minutes)
-
-
想购买您这个站,我的联系方式QQ741756694微信同步 能卖联系
-
-
-
博主的博客用的什么技术栈,内容都是干货,赞
-
-
https://www.liuhaihua.cn/archives/40657.html 这篇博客中的图片打不开了
-
不会英语啊。
-
Loading...
![[HBLOG]公众号](https://www.liuhaihua.cn/img/qrcode_gzh.jpg)

